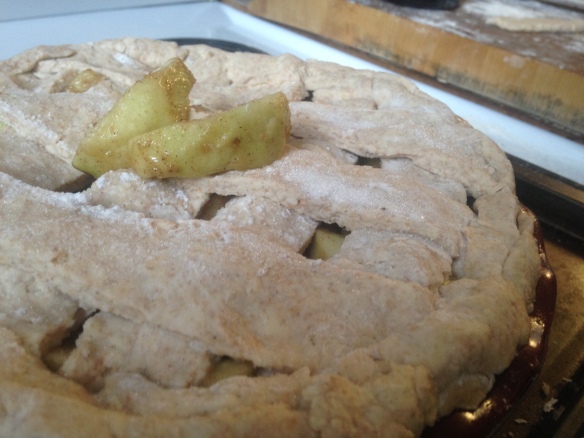
This one may seem a little intimidating to the novice bakers out there, but trust me when I say that baking a pie from scratch has to be one of the most satisfying things out there. There’s nothing like the feeling of pulling a pie- an actual pie that you made- out of the oven and realizing that it’s not rocket science. You don’t have to be a master pastry chef.
Time. Patience. Effort. Those are the ingredients that you need to make a great pie. (You also may want to stock up on some of the actual food-related ingredients listed below.) And trust me, this classic apple pie is so worth it. Once you’ve mastered the crust, I encourage you to try other fruits but this is best enjoyed RIGHT NOW when apples are in season and found in multitudes at the stands along the country roads.
Classic Apple Pie (serves 10)
Crust
3 ½ c. all-purpose flour
2 tbsp granulated sugar
½ tsp salt
¾ c. very cold butter cut into ½” pieces
Filling
6 large tart apples
½ c. firmly packed brown sugar
2 tbsp all-purpose flour
1 tsp ground cinnamon
1 tsp vanilla extract
B’s Tip: Get yer apron on, tie yer hair back and get all your supplies together. Making a pie crust and pie filling from scratch requires being organized and methodical, but you can do it. Yes you can. I don’t normally number the steps in my recipes because they’re usually pretty simple, but I’ve labeled them here for your convenience. Hope it helps!
- In a large mixing bowl, combine 2 ½ c. of the flour, the granulated sugar and salt. Stir until well blended.
- Drop the butter pieces into the flour mixture. Using a pastry blender or table knives, work butter and flour together in a chopping motion. If using 2 knives cut in by drawing the knives in opposite directions through the butter and flour mixture. Scrape off the excess batter that clings to knives. Keep cutting in the butter until the mixture looks like coarse crumbs with only very small pieces of butter visible.
- Pour the cold water over the top of the flour-butter mixture. Using the wooden spoon, stir gently until the mixture forms moist crumbs. Dump your crumbs onto a work surface. Divide into 2 equal piles. Using your hands, press each pile of crumbs into a flat disk. Wrap the disks up in plastic wrap and put in fridge until well-chilled, for at least 30 minutes, or for as long as 2 days.
- Make the apple filling: Cut apples into slices (1/2” thick). Pile slices into mixing bowl. Add brown sugar, flour, cinnamon and vanilla. Stir until well-blended.
- Remove dough from refrigerator. Set 9” pie dish on baking sheet. Preheat oven to 450F.
- Sprinkle work surface with little of remaining flour and set rest aside. Unwrap one disk of dough and set it in the middle of floured surface. Using rolling pin press gently on disk to flatten slightly.
- Sprinkle the top of the dough with a little more of the flour. Place the rolling pin on the center of the dough. Using a little pressure, roll the pin over the dough to the far outer edge. Give the dough a little turn to the right, sprinkle with more flour and starting from the center, roll again. Repeat the turning, flouring and rolling until you have a large round circle about 14” in diameter. If the dough begins to stick, slide the long metal spatula underneath to loosen it, and sprinkle both sides of the dough circle with a little flour.
- Move the baking sheet close to the dough circle. Loosely wrap the dough circle around the rolling pin. Holding the rolling pin, lift the dough over the pie dish. Slowly unroll the dough so it covers the dish and hangs over the edges.
- Using fingertips, gently press dough into dish. Pile in apple filling.
- Repeat rolling steps 6-7 for top and transfer on as in step 8.
- Press edges of top and bottom dough using knife or scissors cut away excess gently, leaving 1” border. Roll the border of dough under itself so that it rests on top of dish rim.
- Pinch all around pie edge with thumb and forefingers. Using sharp knife, cut 3 small slits into top crust.
- Bake pie on baking sheet until the top is brown and the apples are tender, about an hour. Test the pie by inserting a knife in one of the slits and into an apple slice. If it glides in, it is done. Cool on rack.
Happy baking!
B

Baking with B appears every other Monday on the Keeping Busy with B Blog. Find out why I like baking so much here. For more of my baking, click here. And for even more recipe inspiration, check out my Pinterest full of food eye candy that will have you licking your computer. Promise.


