Baking with B: Homemade Granola Bars

Granola, granola, granola. In all the forms, with all the flavours: nuts, fruit, chocolate. You name it, I’m addicted. I’ve never really met a granola that I didn’t like and I’m a firm believer that it tastes best with a healthy heap of thick yogurt, some fresh fruit, and a drizzle of honey.

But sometimes…I get lazy. And I get busy. And in the summertime there are some days that are just so beautiful that I feel like I’ll explode if I don’t get outside right this minute and enjoy the fresh air. Who has time for things like cleaning and showering and eating when there’s sunshine and a warm breeze waiting? (I’m joking; of course I shower.)

Mornings like these my dog, Gemma, is raring to go too, so I’ve taken to making a big batch of these whenever I can force myself to stay indoors to bake for an hour or two. Then it’s grab one of these and seeing where the morning takes us- to the park, along the boardwalk- the possibilities seem endless. Better take two along, just in case.

Homemade Granola Bars (makes 12-16)

2 c. old-fashioned oatmeal

1 c. sliced almonds

1 c. shredded coconut, loosely packed

½ c. toasted wheat germ

3 tbsp unsalted butter

2/3 c. honey

¼ c. light brown sugar, lightly packed

1 ½ tsp. pure vanilla extract

¼ tsp. kosher salt

½ c. chopped pitted dates

½ c. chopped dried apricots

½ c. dried cranberries

Preheat the oven to 350F. Butter an 8×12” baking dish and line it with parchment paper. Toss the oatmeal, almonds, and coconut together on a sheet pan and bake for 10-12 minutes, stirring occasionally, until lightly browned. Transfer the mixture to a large mixing bowl and stir in the wheat germ. Reduce the oven temperature to 300F. Place the butter, honey, brown sugar, vanilla, and salt in a small saucepan and bring to a boil over medium heat. Cook and stir for a minute, then pour over the toasted oatmeal mixture. Add the dates, apricots, and cranberries and stir well. Pour the mixture into the prepared pan. Wet your fingers and lightly press the mixture evenly into the pan. Bake for 25-30 minutes, until light golden brown. Cool for at least 2-3 hours before cutting into squares.

Happy baking!

B

KBwB-Flower-50

Baking with B appears every other Monday on the Keeping Busy with B Blog. Find out why I like baking so much here. For more of my baking, click here. And for even more recipe inspiration, check out my Pinterest full of food eye candy that will have you licking your computer. Promise.

How Do I Choose the Right Paint Color?

KBB_paint_deck

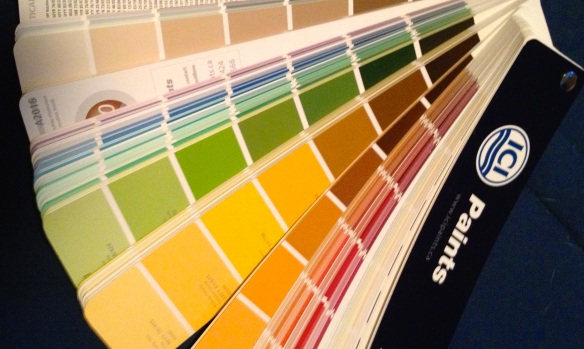
It’s amazing how something so simple as painting a room can change the feel of a space completely. It’s easy to see how paint can make such an important impact on the place you’re decorating. Unfortunately, we all too often fumble with this important decision. So if you find yourself in the paint aisle going cross-eyed from staring at paint chips for so long, here are a couple of rules I try to follow to make the best decision.

First, the color has to work with the rest of the room. It’s nice to want to pick a color because it’s your favorite or because you grew up with the same color in your living room, but if it doesn’t end up working with your textiles and furniture than it’s better off somewhere else- otherwise you’re going to end up hating it!

Keep in mind though when we’re talking about a paint color “going” with the rest of the room, we don’t mean matching. Making sure that everything is a room was the same color blue would make you feel as if you were living a giant blueberry. So unless your name is James and your last residence was a giant peach, stay away from matching everything.

Here’s the secret to why it’s frustrating: because not all colors are made the same.

This is your mini science lesson for the day: we all know that the human eye sees color based on a light spectrum. And that light spectrum is created when light bounces off of things. Unfortunately, that means depending on what the light is bouncing off of, the color will appear differently to our eyes. Smooth surfaces, textured surfaces, even different types of cloth are very rarely going to appear the exact same shade. Paint is never going to match a cushion, or a rug, or a smudge in a painting exactly.

So how do you incorporate color into a room that’s already filled with colorful stuff? Do what designers do and “pull” a color.

When in doubt, go for a neutral color. It’s hard to go wrong and it’s the safest bet for pulling everything in the room together, especially if you’re still recovering from blueberry syndrome.

Throw those paint chips up on the wall of the room you wish to paint and live with them a little bit. Move the paint chips around the room occasionally and see how the light bounces of of them. How do they look in the morning compared to the evening? In the night? With the lights on? Off?

Last but not least, if wavering between two shades of paint is making you go cross-eyed, go for the lighter one. Paint usually dries slightly on the darker side, and once you’ve painted the room you might find the impact of the darker shade harder to absorb at first.

The good news about choosing a paint color is that it doesn’t have to be that stressful. If you rally can’t stand the shade you picked, paint in again! It’s an effective and cheap way to makeover a room to suit whatever your style and needs dictate.

KBwB-BFlower-50Feeling inspired to make your space feel like your own? Visit my busy page for more ideas on projects that I’ve been working on around the house.

10 Myths About Organizing

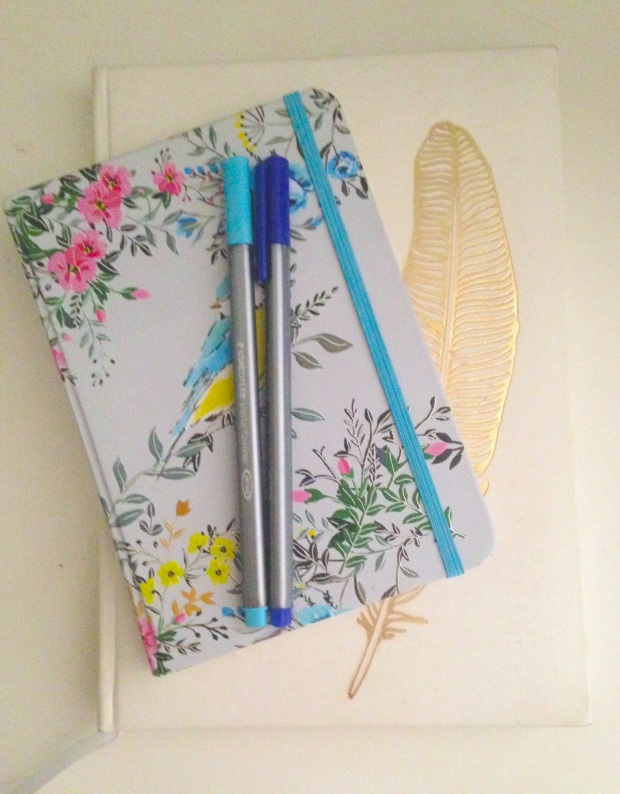
KBB_notebook_and_journalOrganizing is not about purging. I think a lot of people fear getting organized because they equate with parting ways with the things that they love. The opposite is totally true: organizing is about deciding what truly matters to you and cultivating a space filled with things you love and appreciate that contribute to your lifestyle.

Organizing is not about changing your system. It’s about improving your system so that it works better for you. ‘Nuff said.

Organizing is not about buying more gadgets. Just because your newly organized kitchen suddenly has space to house a new fancy juicer doesn’t mean it’s a reason to purchase a new fancy juicer. Sometimes a little blank space helps us to visually appreciate the things you already have. This, of course, does not apply if you were organizing your kitchen to make room for a fancy juicer (if fancy juice is indeed your thing).

Organizing is not about making over a space. Cosmetic changes to the aesthetic are one thing; a well-organized space is not only cosmetically pleasing because it’s clutter-free and carefully planned, it’s cosmically pleasing because it attributes to an easier workflow and a more enjoyable lifestyle.

Organizing is not about creating storage. I once had a client that I was helping move to a bigger space. She had talked about the transition for months; finally her boys were going to have enough space in their rooms for all of their toys. I agreed with her until I saw that each of her small children had bedrooms that rivaled the size of my apartment with giant, gorgeous built-ins along each wall. They were originally meant for toys; however, their new house came with a giant playroom in the basement where the kids spent most of their time. Empty cupboards meant that more clutter quickly accumulated and my client found herself in the middle of her original dilemma. It just goes to show that thoughtful editing and creative organizing are sometimes better solutions than creating more storage to house more things you don’t need or want.

Organizing is not about hiding things away. If you have cherished things that you love, display them! Do you relish looking at all of the piles of work you have to do? You’re a weirdo, but who cares? Leave them on your desk! Just as everyone has different tastes in décor, different people have a variety of organizing styles that lend themselves to a certain style or another. There’s no sense in changing your system just because you aspire to a certain look. (See Number 2.)

Organizing is not about upgrading. Just because you saw that super pretty double door fridge on Pinterest doesn’t mean you can’t organize the fridge you own currently. It’s great to have upgrading goals, but don’t use them as excuses to prevent yourself from improving your lifestyle before you improve your appliances or furniture.

Organizing is not about changing your habits. It’s about recognizing those habits and organizing your space to accommodate them. I’m normally a pretty neat person but as soon as I walk in the door I throw down my keys and they usually fall where they may. I’ve since left a pretty bowl on the shelf next to the door to collect all the shrapnel (like loose change and sunglasses) from my comings and goings throughout the day.

Organizing is not about making things pretty. Yes, organizing a room usually makes it pretty but you shouldn’t hold off on purging just because you don’t have a pretty box to put it in. Conversely, don’t fool yourself into thinking that buying even more pretty baskets and storage accessories will automatically make your space more organized- it can sometimes have the opposite effect.

Organizing is not about abundance. Giant craft rooms and majestic libraries are mouthwatering to look at, but aspiring to have these kinds of spaces can sometimes be unrealistic. I’d love to have drawers upon drawers of pretty pens or fancy baking supplies too, but having an organized space has allowed me to make peace with my reality and appreciate the things that I do have and love.

KBwB-Flower-50

I’ve got a flexible, highly personalized approach to my organizing that’s governed by these truths- now I want to know yours! Send them at me at keepingbusyb@gmail.com or comment below. Want to read more of my organizing thoughts? I’ve got a lot more that I’ve shared here.

Baking with B: Chocolate and Pear Muffins

Pears in my mouth. All the time. That is what I want. Pears…and chocolate. So when I stumbled across this recipe in my cookbook collection, I just about exploded. How had I not made these before? How have I not shared these with you?

So, here they are, in all their rich, fruity, chocolate-y glory. The cinnamon just makes the whole thing.

You’re welcome.

Chocolate and Pear Muffins (makes 12)
2 c. all-purpose flour

1 1/3 c. chopped, peeled pear

¾ c. brown sugar

3 ½ oz. chopped milk chocolate bar

2 tsp baking powder

¼ tsp ground cinnamon

¼ tsp salt

1 egg

¾ c. buttermilk (or soured milk)

½ c. cooking oil

Combine first seven ingredients in a bowl. Make a well in the centre. Whisk remaining 3 ingredients in small bowl. Add to well. Stir until just moistened. Fill 12 greased muffin cups ¾ full. Bake in 375F oven for about 25 minutes until wooden pick inserted in centre of muffin comes out clean. Let stand in pan for 5 minutes. Remove muffins from pan and place on wire rack to cool.

B’s Tip: Unless you make a habit of having buttermilk in your fridge all the time, you may need to fudge it and make “soured milk” to substitute. Here’s how you do it: Measure 2 ½ tsp white vinegar or lemon juice into a 1 c. liquid measure. Add enough milk to make ¾ c. Stir. Let stand for 5 minutes. I honestly use this trick more often than I use buttermilk and it works like a charm.

Happy baking!

B

KBwB-Flower-50

Baking with B appears every other Monday on the Keeping Busy with B Blog. Find out why I like baking so much here. For more of my baking, click here. And for even more recipe inspiration, check out my Pinterest full of food eye candy that will have you licking your computer. Promise.

Baking with B: Ryan’s Cookies and Cream Ice Cream Cake

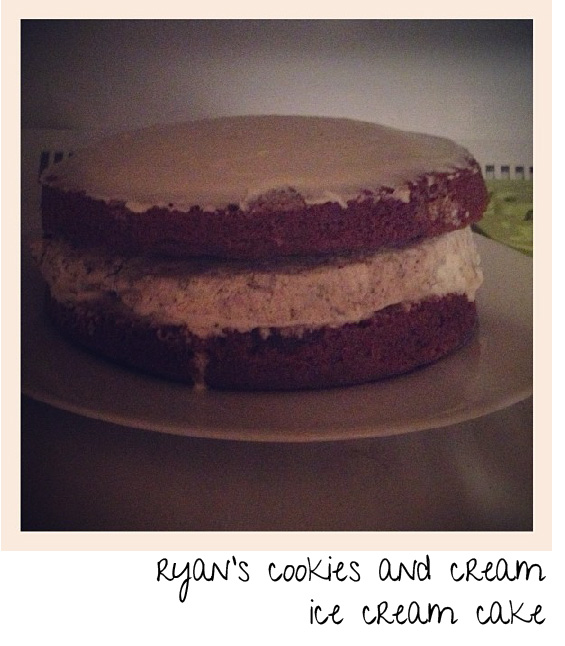
KBB_baking_ice_cream_cakeI was all set on baking Ryan a cake for his birthday as a surprise after he confessed to me he hadn’t had birthday cake in years, and I quizzed everyone who would listen about their favorite kinds of cake so I would know what kind to bake.

Wouldn’t you know that two hours before he was due to arrive Ryan announced that his dream birthday cake would be an ice cream cake, and so I moved hell and high water to make up this ice cream cake recipe at record speed. Cookies and cream is his favorite flavor, and so that is what he got, although if it had been my birthday I would have requested chocolate chip cookie dough.

Not that I’m asking you to make a cake for my birthday or anything. Ahem.

Ryan’s Cookies and Cream Ice Cream Cake (serves 8)

I’m not sure how they make real ice cream cakes out in real ice cream cake land, but I made the ice cream layer myself by scooping the softened ice cream into a disposable aluminum pan, smoothing it out with the back of my scoop, and letting it harden while I baked the cake layers. I normally don’t cook with disposable pans, but this step ensured all of my layers were the same size, and allowed me to pop out the ice cream layer without much fuss.

To make the cake:

1 1/3 c. all-purpose flour

2 tbsp unsweetened cocoa

1 tbsp baking powder

3/4 c. unsalted butter, softened

generous 3/4 c. sugar

3 eggs, beaten

1 tsp vanilla extract

2 tbsp milk

Preheat the oven to 350F. Grease two 8-inch layer cake pans and line the bottoms with parchment paper. Sift the flour, cocoa and baking powder into a large bowl and add the butter, sugar, eggs and vanilla extract. Beat well until the mixture is smooth, then stir in the milk.

Divide the batter between the prepared pans and smooth level. Bake in the preheated oven for 25-30 minutes, or until golden brown and firm to the touch. Let cool in the pans for 2-3 minutes, then turn out onto a wire rack to cool completely.

Construct your cake by popping out ice cream layer from its pan and sandwiching between the two layers. You may want to secure the layers by spreading a thin layer of icing on the cake layers before sandwiching. Top with your favorite frosting and freeze immediately. Let stand a few minutes before serving in order to cut the cake more easily.

KBwB-Flower-50

I don’t always like to endorse particular brands or products on the blog, but I do like promoting small businesses and I swear without the pint of cookies and cream ice cream from Ed’s Real Scoop my cake wouldn’t have gone over half as well! If you’re in the Toronto area, please do check them out. They currently have two great locations in the Leslieville and Beaches neighborhoods. I’m hard pressed to choose a favorite, but if you really twisted my arm I would recommend the Raspberry White Chocolate. You haven’t tasted anything like it.

Happy baking!

B

Baking with B appears every other Monday on the Keeping Busy with B Blog. Find out why I like baking so much here. For more of my baking, click here. And for even more recipe inspiration, check out my Pinterest full of food eye candy that will have you licking your computer. Promise.

My Office Essentials

KBB_closeup_rainbow_markers

I have to tell you a funny story. It’s about one of my co-workers and how her obsession with office supplies actually got her into trouble.

In a busy, paper-based medical office, a lot of faxing and photocopying occurs. We use black pens when scheduling or writing memos simply because the pens with blue ink do not produce legible faxes or photocopies.

However, my co-worker just had to use the blue pens because they were part of her office essentials- the funny, little quirky preferences that we develop for certain stationary supplies or office gadgets that inexplicably make us feel more confident and more productive at our jobs.

Our office manager begged her until she was blue in the face (pun intended) to switch, but she just couldn’t. We eventually removed all of the blue pens from the office, but to this day my co-worker claims that writing with the blue pen just makes her feel better.

Don’t tell me you don’t have your favorite office supplies because I know that you do. And because I’m in the mood for sharing, and I love making lists, I’ve compiled a list of my office “essentials”- the supplies that I need on a daily basis that not only assist me in being productive and staying organized, but make my work honestly more enjoyable. I’d love for you to share yours as well by emailing me at keepingbusyb@gmail.com.

A paper-based agenda. Writing down my appointments and the time-sensitive actions in my calendar solidifies them in my memory, and I developed a system of storing my to-do lists in my agenda so I can access them on the fly. Bonus points if the agenda is pretty.

Colorful pens. I used to be so obsessed with color-coding that my classmates in first-year linguistics at university made up a verb to describe my unique brand style of transforming lecture notes into a crazy rainbow of reminders and possible study questions.

Pretty notebooks. Anyone notice a theme here? They’re essential for jotting down notes in a meeting or recording an idea you got while waiting for the street car. Much like my pens, I carry these babies around with me until they bite the dust. Or get filled up with ideas. Whichever comes first.

I’m constantly on the go so I am forced to manage most of my emails and phone calls through my Smartphone. It also has a copy of my calendar and a couple of apps I use to manage my time. And I also have the IKEA app which just sort of draws me into this universe of assembly-required furniture.

Highlighters. I make a ton of notes and use these often to color-coordinate tons of reminders, projects, etc. They also make my agenda look pretty. Bonus!

Blank notecards. Because. I. Believe. In. The. Power. Of. The. Handwritten. Note.

Post-Its. Flags, shapes, sizes, colors- I personally consider them to be one of the ultimate reminders- kind of like my nagging conscience, only prettier.

To others my essentials might seem frivolous or unnecessary, but to me, they’re what keeps me happy before, during and after the work day. After all, what’s a few dollars to spend on post-its if they make everything look pretty and organized?

KBwB-BFlower-50To check out more of my favorite office supplies? Some of the stuff I dig is featured on my Amazon store here, and I should tell you that I get a small (small!) kickback if you see something you like. Did I miss one of your favorites on my list? Comment below or drop me a line at keepingbusyb@gmail.com and set things straight!

Baking with B: Classic Chocolate Cupcakes

KBB_baking_chocolate_cupcakesI used to baby-sit this little girl who used to call these “cups o’cake” which always made me laugh until I realized that the recipe we always used to make these during our times together was actually called “Cups o’Cake”- although I can’t for the life of me remember which cookbook it was from all of these years later. (Help me out here, folks, if you know it.) Needless to say I haven’t baby-sat her in years and years, but these chocolate cupcakes have remained a staple in my baking repertoire because they really are like “cups o’cake”- light, and fluffy, and melt-in-your-mouth. These will not stick around for along, and if you pair these with chocolate icing, all bets are off. Hide your cupcakes. I’m coming over.

Classic Chocolate Cupcakes (makes 12)

¾ c. unsweetened cocoa

1 c. all-purpose flour

1 tsp baking powder

¼ tsp salt

¾ c. unsalted butter, room temperature

1 c. sugar

2 large eggs

1 tsp vanilla

½ c. milk

Preheat oven to 350F. Line 12 muffin cups with paper liners. Sift cocoa, flour, baking powder and salt together. Set aside. In large bowl, beat butter and sugar with electric mixer until light and fluffy. Add eggs one at a time, beating well. Add vanilla. Add half the flour mixture and beat. Add milk and beat. Add the remaining flour mixture and beat for 3 minutes. Spoon batter into muffin cups. Bake for 25 minutes or until a toothpick inserted into the center of a cupcake comes out clean. Cool on rack.

Happy baking!

B

KBwB-Flower-50

Baking with B appears every other Monday on the Keeping Busy with B Blog. Find out why I like baking so much here. For more of my baking, click here. And for even more recipe inspiration, check out my Pinterest full of food eye candy that will have you licking your computer. Promise.  

Wanna know more about making cupcakes en masse? Visit this post to see how I did it. Looking for other delicious cupcake recipes? Click here.

Run Your Errands More Effectively Today!

KBB_fancy_starbucksOne of my friends recently took on a new part-time job; it’s not a permanent thing, but it helps her get her foot in the door in the particular field in which she wants to eventually work. A couple of extra shifts a week though meant drastically reorganizing her well-crafted schedule so much so that all of her routines were thrown off balance. When I asked her how her weekend was the other day, she was responded with the usual complaint that she never felt she had enough time to herself. “I spend most of my time off doing chores and running errands,” she complained. “I’m always popping out to do one thing or another and it’s starting to get to the point where I feel like I’m a jack-in-the-box.”

Have you experienced this too? Girl (guy), I know the feeling. As a freelancer my schedule is all over the place and I’ve had jobs where I’ve found myself working at all sorts of strange hours while still trying to have a life. It’s sad that so much of what should be vital personal time is eaten up by mundane daily tasks, but I do have some tricks for taking back that me-time. One of them is trying to running my errands more effectively.

Running “errands”- going to the post office, marketing, picking up and dropping off gift items, donations, prescriptions, dry cleaning- all of these things are necessary evils in order for our lives to run smoothly. But if I left the house every time I needed something, or every time another task popped up, I’d be leaving the house constantly. There’s nothing fun or productive about it.

That’s why I keep track of all of my errands in an ongoing list I have stashed at the back of my agenda and try to group similar tasks to suit my needs and my schedule. I work a lot from home, so I try to save my errands for times when I’m already out of the house so I don’t have to make special trips for specific items. Where possible I try to delegate my tasks or incorporate them into a dog walk. (That is, of course, providing the errand in question is dog-friendly. My dog has been known to shoplift. I wish I that was joke.) As a last resort I will put aside a chunk of time to complete my errands and plan the most straightforward route ahead of time.

A little bit of preparation can help you fit these pesky tasks into your schedule in a painless way, but a little behind-the-scenes work can help as well. I always like to make sure my bag is packed ahead of time and I always try to make sure I pack whatever I need to complete any errands I might do on my outing.

And if there’s one rule that I live by, it’s: never, ever leave the house without a list. (Anyone who has wandered around the grocery store after work starving knows what I’m talking about.) The key to running your errands more effectively is to make sure you’re prepared and there’s nothing more productive than a list that’s able to keep track of what you’re doing, where you’re going, and what you need in order to do it.

Who knows? You might even make you enjoy getting out of the house for once.

KBwB-Flower-50

Is there one errand that you absolutely hate doing? Mine is going to the post office. I’d love to hear yours when you drop me a line at keepingbusyb@gmail.com. For more suggestions on how to organize yourself, get yourself over to my Busy page.

Baking with B: Strawberry Rhubarb Muffins

KBB_baking_strawberry_rhubarb_muffinsI feel like I’m constantly running behind this year. I almost missed the fresh Ontario asparagus that I love eating just sautéed with butter, lemon and a little bit of sea salt. I barely had time to enjoy the tiny, juicy strawberries that grow not even an hour outside of our city.

So I’m so glad that my sister and I were able to raid the rhubarb patch that grows next door to my grandfather’s house in Tillsonburg, Ontario. The lady who owns the house is always very generous with her rhubarb plants so this year both L and I came away with enough to make some awesome rhubarb cupcakes for a trunk show my sister was holding, and these delicious muffins.

I know I’m a muffin freak. But this has streusel topping and a sweet-tart taste that leaves you wanting more. Every. Single. Time. Or experiment with your favorite flavors and tell me what you think. The local rhubarb is well over and most of the strawberries too, but I have eye on some fresh peaches that hit the markets a couple of weeks ago. My mouth is just salivating thinking about them!

Strawberry Rhubarb Muffins (yields 12)

2 c. all-purpose flour

1 c. brown sugar, packed

1/2 c. whole wheat flour

1 tsp baking soda

1/2 tsp salt

1 large egg, beaten

3/4 c. buttermilk

1/4 c. cooking oil

1 c. chopped fresh (or frozen, partially thawed) rhubarb

1 c. chopped fresh (or frozen, partially thawed) strawberries

Streusel Topping

1/2 tsp cinnamon

1/3 c. brown sugar packed

Combine first 5 ingredients in large bowl. Make a well in centre. Combine next 3 ingredients in medium bowl. Add rhubarb and strawberries. Stir. Add to well. Stir until just moistened. Fill 12 greased muffin cups 3/4 full. Combine cinnamon and brown sugar in small cup. Sprinkle over top. Bake in 375F oven for 18 to 20 minutes until wooden pick inserted in centre of muffin comes clean. Let stand in pan for 5 minutes. Remove muffins from pan and place on wire rack to cool.

Happy baking!

B

KBwB-Flower-50

Baking with B appears every other Monday on the Keeping Busy with B Blog. Find out why I like baking so much here. For more of my baking, click here. And for even more recipe inspiration, check out my Pinterest full of food eye candy that will have you licking your computer. Promise.

Baking with B: Chocolate Banana Cookies

KBB_baking_chocolate_banana_cookiesYou guys, I have the solution for banana bread boredom- you know, when you use so many overripe bananas you start to get sick of baking with them? (I know right? How could you get sick of banana bread? Or these banana muffins.)

Enter the chocolate banana cookie, the cookie that tastes like chocolate cake, with just a hint of banana flavor. This cake-like cookie even has the stamp of approval from my co-worker Lucy who, to the best of my knowledge, has never consumed a piece of fruit. Like ever.

Try these! They’re easy and yummy and I promise you’ll never feel like you’re in a rut baking with bananas again.

Chocolate Banana Cookies (yields 60)

1 c. margarine or butter, softened

1 c. brown sugar, packed

2 large eggs

1 tsp vanilla

1 c. mashed banana

2 1/2 c. all-purpose flour

1/2 c. cocoa

2 tsp baking powder

1/2 tsp baking soda

2 tsp ground cinnamon

1 1/2 c. milk chocolate chips (optional)

Cream margarine and brown sugar together in large bowl until light and fluffy. Beat in eggs and vanilla until well blended. Add banana. Beat well until mixed.

Combine flour, cocoa, baking powder, baking soda and cinnamon in a medium bowl. Gradually add to banana mixture until well blended.

If desired, add chocolate chips. (This is highly desired.) Stir until evenly distributed. Drop by level tablespoonfuls onto greased cookie sheet. Bake in 350F oven for about 14 minutes.

Happy baking!

B

KBwB-Flower-50

Baking with B appears every other Monday on the Keeping Busy with B Blog. Find out why I like baking so much here. For more of my baking, click here. And for even more recipe inspiration, check out my Pinterest full of food eye candy that will have you licking your computer. Promise.