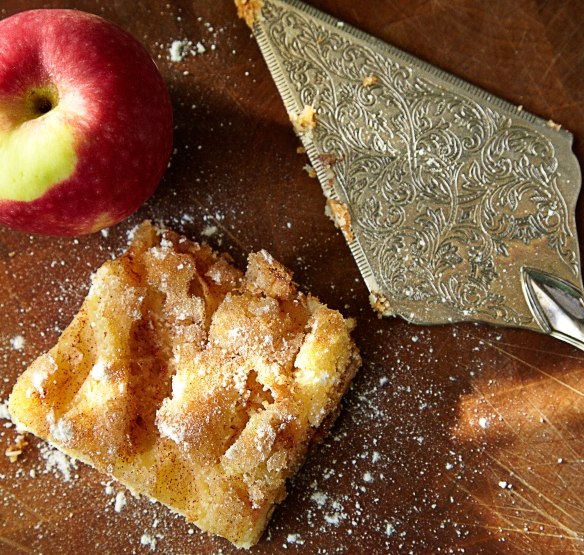
Baking with B: Norwegian Apple Cake

_mg_9357

For those of you who are interested (and I know y’all totally are) I have Swedish in my background, which is why I have such an unusual first name. On this blog I masquerade as B, but in real life my name is Britta, and I look just as Scandinavian as the name sounds.

Also, sometimes I get asked if I’m named after the character in Community, to which I usually respond that I changed my name when the show came out so I can more easily identify with Gillian Jacobs’ character.

KBB_britta_communityBack to the cake though, because I haven’t even started to tell you about how good it is. It’s simple, light, and can be served with pretty much anything, which in a world of decadent desserts makes it the peacekeeper of all the countries. I mean, desserts. This recipe is called “Norwegian Apple Cake” but my Swedish mother has been making a version of this for as long as I can remember so I guess it masquerades as “Scandinavian” no matter what its particular country of origin.

You too can masquerade as a Scandinavian, or a Britta, and make this cake too but I have to warn you- it’s so crazy simple you’re going to start thinking you are Norwegian because you’re going to make it so often.

Norwegian Apple Cake (serves 12)

1 1/2 c. sugar

1 stick butter

2 eggs

2/3 c. light cream

3/4 c. flour

3 tsp baking powder

3-4 cooking apples

Grease and flour an 8×12-inch pan. Beat the eggs and 1 c. of the sugar until the mixture is thick and creamy and the whisk (or beater) leaves a trail after you lift it out. Pour the butter and milk into a pan. Bring to a boil and stir, still boiling, into the eggs and sugar. Sift in the flour and baking powder and fold carefully into the batter so there are no lumps of flour. Pour the mixture into the prepared roasting pan. Peel, core and slice the apples; arrange them over the batter. Sprinkle with the remaining sugar. Bake in a moderately hot oven (400F) for 20-25 minutes until well-risen and golden brown. Cool in the pan, and then cut into slices.

B’s Tip: If you want to bring out the apple flavor even more, try mixing in 2 tsp of cinnamon to the remaining sugar before sprinkling it on top of the apples and popping it in the oven. Feel like making the recipe a little healthier? Top with less sugar, or leave it out altogether. (Half a cup is pretty generous and while delicious, not necessary.)

Happy baking!

B

KBwB-Flower-50

Baking with B appears every other Monday on the Keeping Busy with B Blog. Find out why I like baking so much here. For more of my baking, click here. And for even more recipe inspiration, check out my Pinterest full of food eye candy that will have you licking your computer. Promise.

Baking with B: Homemade Applesauce

KBB_baking_homemade_applesauceWhat is it about apples that make it seem like autumn has arrived? I know for most people the all of quintessential fall foods have something to do with pumpkin spice, but for me it’s the smell of apples baking in the oven in a pie, or simmering on a stovetop that brings me back to my childhood when my parents used to drive my sister and I out of the city to pick our own apples.

And nothing says childhood more than making your own homemade applesauce which is (somewhat) nutritious, delicious and easy as pie…except that it’s applesauce.

Homemade Applesauce (makes 6 cups)

4 lbs. apples (my favorite is Gala)

¼ c. lemon juice

3 tbsp dark brown sugar

This recipe is so simple you’re not even going to think it’s real but it is: just peel, core and slice your apples. Pop them in a large pot with lemon juice and 1 ½ c. water. Bring to a boil, then reduce heat and simmer until apples are very soft and falling apart. Mash with a potato masher or pulse in a food processor. Add sugar. If you’re feeling super fancy, you may want to add a pinch of cinnamon or nutmeg, or both! Let cool and transfer to an airtight container. It keeps for 5 days in the fridge or you can freeze the leftovers for later, up to 2 months.

Happy baking!

B

KBwB-Flower-50

Baking with B appears every other Monday on the Keeping Busy with B Blog. Find out why I like baking so much here. For more of my baking, click here. And for even more recipe inspiration, check out my Pinterest full of food eye candy that will have you licking your computer. Promise.
 

Baking with B: Homemade Granola Bars

Granola, granola, granola. In all the forms, with all the flavours: nuts, fruit, chocolate. You name it, I’m addicted. I’ve never really met a granola that I didn’t like and I’m a firm believer that it tastes best with a healthy heap of thick yogurt, some fresh fruit, and a drizzle of honey.

But sometimes…I get lazy. And I get busy. And in the summertime there are some days that are just so beautiful that I feel like I’ll explode if I don’t get outside right this minute and enjoy the fresh air. Who has time for things like cleaning and showering and eating when there’s sunshine and a warm breeze waiting? (I’m joking; of course I shower.)

Mornings like these my dog, Gemma, is raring to go too, so I’ve taken to making a big batch of these whenever I can force myself to stay indoors to bake for an hour or two. Then it’s grab one of these and seeing where the morning takes us- to the park, along the boardwalk- the possibilities seem endless. Better take two along, just in case.

Homemade Granola Bars (makes 12-16)

2 c. old-fashioned oatmeal

1 c. sliced almonds

1 c. shredded coconut, loosely packed

½ c. toasted wheat germ

3 tbsp unsalted butter

2/3 c. honey

¼ c. light brown sugar, lightly packed

1 ½ tsp. pure vanilla extract

¼ tsp. kosher salt

½ c. chopped pitted dates

½ c. chopped dried apricots

½ c. dried cranberries

Preheat the oven to 350F. Butter an 8×12” baking dish and line it with parchment paper. Toss the oatmeal, almonds, and coconut together on a sheet pan and bake for 10-12 minutes, stirring occasionally, until lightly browned. Transfer the mixture to a large mixing bowl and stir in the wheat germ. Reduce the oven temperature to 300F. Place the butter, honey, brown sugar, vanilla, and salt in a small saucepan and bring to a boil over medium heat. Cook and stir for a minute, then pour over the toasted oatmeal mixture. Add the dates, apricots, and cranberries and stir well. Pour the mixture into the prepared pan. Wet your fingers and lightly press the mixture evenly into the pan. Bake for 25-30 minutes, until light golden brown. Cool for at least 2-3 hours before cutting into squares.

Happy baking!

B

KBwB-Flower-50

Baking with B appears every other Monday on the Keeping Busy with B Blog. Find out why I like baking so much here. For more of my baking, click here. And for even more recipe inspiration, check out my Pinterest full of food eye candy that will have you licking your computer. Promise.

Baking with B: Chocolate and Pear Muffins

Pears in my mouth. All the time. That is what I want. Pears…and chocolate. So when I stumbled across this recipe in my cookbook collection, I just about exploded. How had I not made these before? How have I not shared these with you?

So, here they are, in all their rich, fruity, chocolate-y glory. The cinnamon just makes the whole thing.

You’re welcome.

Chocolate and Pear Muffins (makes 12)
2 c. all-purpose flour

1 1/3 c. chopped, peeled pear

¾ c. brown sugar

3 ½ oz. chopped milk chocolate bar

2 tsp baking powder

¼ tsp ground cinnamon

¼ tsp salt

1 egg

¾ c. buttermilk (or soured milk)

½ c. cooking oil

Combine first seven ingredients in a bowl. Make a well in the centre. Whisk remaining 3 ingredients in small bowl. Add to well. Stir until just moistened. Fill 12 greased muffin cups ¾ full. Bake in 375F oven for about 25 minutes until wooden pick inserted in centre of muffin comes out clean. Let stand in pan for 5 minutes. Remove muffins from pan and place on wire rack to cool.

B’s Tip: Unless you make a habit of having buttermilk in your fridge all the time, you may need to fudge it and make “soured milk” to substitute. Here’s how you do it: Measure 2 ½ tsp white vinegar or lemon juice into a 1 c. liquid measure. Add enough milk to make ¾ c. Stir. Let stand for 5 minutes. I honestly use this trick more often than I use buttermilk and it works like a charm.

Happy baking!

B

KBwB-Flower-50

Baking with B appears every other Monday on the Keeping Busy with B Blog. Find out why I like baking so much here. For more of my baking, click here. And for even more recipe inspiration, check out my Pinterest full of food eye candy that will have you licking your computer. Promise.

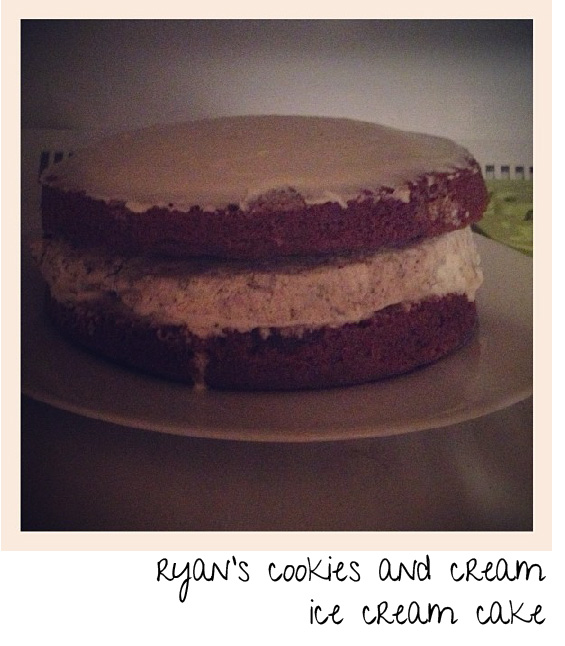
Baking with B: Ryan’s Cookies and Cream Ice Cream Cake

KBB_baking_ice_cream_cakeI was all set on baking Ryan a cake for his birthday as a surprise after he confessed to me he hadn’t had birthday cake in years, and I quizzed everyone who would listen about their favorite kinds of cake so I would know what kind to bake.

Wouldn’t you know that two hours before he was due to arrive Ryan announced that his dream birthday cake would be an ice cream cake, and so I moved hell and high water to make up this ice cream cake recipe at record speed. Cookies and cream is his favorite flavor, and so that is what he got, although if it had been my birthday I would have requested chocolate chip cookie dough.

Not that I’m asking you to make a cake for my birthday or anything. Ahem.

Ryan’s Cookies and Cream Ice Cream Cake (serves 8)

I’m not sure how they make real ice cream cakes out in real ice cream cake land, but I made the ice cream layer myself by scooping the softened ice cream into a disposable aluminum pan, smoothing it out with the back of my scoop, and letting it harden while I baked the cake layers. I normally don’t cook with disposable pans, but this step ensured all of my layers were the same size, and allowed me to pop out the ice cream layer without much fuss.

To make the cake:

1 1/3 c. all-purpose flour

2 tbsp unsweetened cocoa

1 tbsp baking powder

3/4 c. unsalted butter, softened

generous 3/4 c. sugar

3 eggs, beaten

1 tsp vanilla extract

2 tbsp milk

Preheat the oven to 350F. Grease two 8-inch layer cake pans and line the bottoms with parchment paper. Sift the flour, cocoa and baking powder into a large bowl and add the butter, sugar, eggs and vanilla extract. Beat well until the mixture is smooth, then stir in the milk.

Divide the batter between the prepared pans and smooth level. Bake in the preheated oven for 25-30 minutes, or until golden brown and firm to the touch. Let cool in the pans for 2-3 minutes, then turn out onto a wire rack to cool completely.

Construct your cake by popping out ice cream layer from its pan and sandwiching between the two layers. You may want to secure the layers by spreading a thin layer of icing on the cake layers before sandwiching. Top with your favorite frosting and freeze immediately. Let stand a few minutes before serving in order to cut the cake more easily.

KBwB-Flower-50

I don’t always like to endorse particular brands or products on the blog, but I do like promoting small businesses and I swear without the pint of cookies and cream ice cream from Ed’s Real Scoop my cake wouldn’t have gone over half as well! If you’re in the Toronto area, please do check them out. They currently have two great locations in the Leslieville and Beaches neighborhoods. I’m hard pressed to choose a favorite, but if you really twisted my arm I would recommend the Raspberry White Chocolate. You haven’t tasted anything like it.

Happy baking!

B

Baking with B appears every other Monday on the Keeping Busy with B Blog. Find out why I like baking so much here. For more of my baking, click here. And for even more recipe inspiration, check out my Pinterest full of food eye candy that will have you licking your computer. Promise.

Baking with B: Classic Chocolate Cupcakes

KBB_baking_chocolate_cupcakesI used to baby-sit this little girl who used to call these “cups o’cake” which always made me laugh until I realized that the recipe we always used to make these during our times together was actually called “Cups o’Cake”- although I can’t for the life of me remember which cookbook it was from all of these years later. (Help me out here, folks, if you know it.) Needless to say I haven’t baby-sat her in years and years, but these chocolate cupcakes have remained a staple in my baking repertoire because they really are like “cups o’cake”- light, and fluffy, and melt-in-your-mouth. These will not stick around for along, and if you pair these with chocolate icing, all bets are off. Hide your cupcakes. I’m coming over.

Classic Chocolate Cupcakes (makes 12)

¾ c. unsweetened cocoa

1 c. all-purpose flour

1 tsp baking powder

¼ tsp salt

¾ c. unsalted butter, room temperature

1 c. sugar

2 large eggs

1 tsp vanilla

½ c. milk

Preheat oven to 350F. Line 12 muffin cups with paper liners. Sift cocoa, flour, baking powder and salt together. Set aside. In large bowl, beat butter and sugar with electric mixer until light and fluffy. Add eggs one at a time, beating well. Add vanilla. Add half the flour mixture and beat. Add milk and beat. Add the remaining flour mixture and beat for 3 minutes. Spoon batter into muffin cups. Bake for 25 minutes or until a toothpick inserted into the center of a cupcake comes out clean. Cool on rack.

Happy baking!

B

KBwB-Flower-50

Baking with B appears every other Monday on the Keeping Busy with B Blog. Find out why I like baking so much here. For more of my baking, click here. And for even more recipe inspiration, check out my Pinterest full of food eye candy that will have you licking your computer. Promise.  

Wanna know more about making cupcakes en masse? Visit this post to see how I did it. Looking for other delicious cupcake recipes? Click here.

Baking with B: Strawberry Rhubarb Muffins

KBB_baking_strawberry_rhubarb_muffinsI feel like I’m constantly running behind this year. I almost missed the fresh Ontario asparagus that I love eating just sautéed with butter, lemon and a little bit of sea salt. I barely had time to enjoy the tiny, juicy strawberries that grow not even an hour outside of our city.

So I’m so glad that my sister and I were able to raid the rhubarb patch that grows next door to my grandfather’s house in Tillsonburg, Ontario. The lady who owns the house is always very generous with her rhubarb plants so this year both L and I came away with enough to make some awesome rhubarb cupcakes for a trunk show my sister was holding, and these delicious muffins.

I know I’m a muffin freak. But this has streusel topping and a sweet-tart taste that leaves you wanting more. Every. Single. Time. Or experiment with your favorite flavors and tell me what you think. The local rhubarb is well over and most of the strawberries too, but I have eye on some fresh peaches that hit the markets a couple of weeks ago. My mouth is just salivating thinking about them!

Strawberry Rhubarb Muffins (yields 12)

2 c. all-purpose flour

1 c. brown sugar, packed

1/2 c. whole wheat flour

1 tsp baking soda

1/2 tsp salt

1 large egg, beaten

3/4 c. buttermilk

1/4 c. cooking oil

1 c. chopped fresh (or frozen, partially thawed) rhubarb

1 c. chopped fresh (or frozen, partially thawed) strawberries

Streusel Topping

1/2 tsp cinnamon

1/3 c. brown sugar packed

Combine first 5 ingredients in large bowl. Make a well in centre. Combine next 3 ingredients in medium bowl. Add rhubarb and strawberries. Stir. Add to well. Stir until just moistened. Fill 12 greased muffin cups 3/4 full. Combine cinnamon and brown sugar in small cup. Sprinkle over top. Bake in 375F oven for 18 to 20 minutes until wooden pick inserted in centre of muffin comes clean. Let stand in pan for 5 minutes. Remove muffins from pan and place on wire rack to cool.

Happy baking!

B

KBwB-Flower-50

Baking with B appears every other Monday on the Keeping Busy with B Blog. Find out why I like baking so much here. For more of my baking, click here. And for even more recipe inspiration, check out my Pinterest full of food eye candy that will have you licking your computer. Promise.

Baking with B: Chocolate Banana Cookies

KBB_baking_chocolate_banana_cookiesYou guys, I have the solution for banana bread boredom- you know, when you use so many overripe bananas you start to get sick of baking with them? (I know right? How could you get sick of banana bread? Or these banana muffins.)

Enter the chocolate banana cookie, the cookie that tastes like chocolate cake, with just a hint of banana flavor. This cake-like cookie even has the stamp of approval from my co-worker Lucy who, to the best of my knowledge, has never consumed a piece of fruit. Like ever.

Try these! They’re easy and yummy and I promise you’ll never feel like you’re in a rut baking with bananas again.

Chocolate Banana Cookies (yields 60)

1 c. margarine or butter, softened

1 c. brown sugar, packed

2 large eggs

1 tsp vanilla

1 c. mashed banana

2 1/2 c. all-purpose flour

1/2 c. cocoa

2 tsp baking powder

1/2 tsp baking soda

2 tsp ground cinnamon

1 1/2 c. milk chocolate chips (optional)

Cream margarine and brown sugar together in large bowl until light and fluffy. Beat in eggs and vanilla until well blended. Add banana. Beat well until mixed.

Combine flour, cocoa, baking powder, baking soda and cinnamon in a medium bowl. Gradually add to banana mixture until well blended.

If desired, add chocolate chips. (This is highly desired.) Stir until evenly distributed. Drop by level tablespoonfuls onto greased cookie sheet. Bake in 350F oven for about 14 minutes.

Happy baking!

B

KBwB-Flower-50

Baking with B appears every other Monday on the Keeping Busy with B Blog. Find out why I like baking so much here. For more of my baking, click here. And for even more recipe inspiration, check out my Pinterest full of food eye candy that will have you licking your computer. Promise.

Baking with B: Classic Vanilla Cupcakes

KBB_baking_vanilla_cupcakesMy friend Melissa is all about doing cupcakes right. For Valentine’s Day she made these insane raspberry-filled cupcakes that were dipped in chocolate and smothered in frosting. Even looking at her Instagram feed makes me gain five pounds. She’s kind of like my cooking mentor in the sense that she always comes up with fabulous taste combinations and meal-planning ideas that would put Martha Stewart to shame.

That’s a big thing for me to admit. I’m obsessed with Martha Stewart.

This particular baking session we decided to take the classic route and make some simply delicious vanilla cupcakes with pink frosting because, of course, it’s Melissa and we had to. But once you’ve mastered this recipe, the possibilities for variations on it are endless. Please experiment with all of the flavors. We dare you too!

Classic Vanilla Cupcakes (makes 36)

3 c. cake flour (not self-rising), sifted

1 ½ c. all-purpose flour

2 ¼ tsp baking powder

1 ½ tsp coarse salt

¾ tsp baking soda

9 oz. (2 sticks plus 2 tbsp) unsalted butter, softened

2 ¼ c. sugar

5 large eggs plus 3 large yolks, room temperature

2 c. buttermilk, room temperature

2 tsp pure vanilla extract

Preheat oven to 350F. Line standard muffin tins with paper liners. Whisk dry ingredients in a large bowl and set aside. In another bowl, cream butter and sugar until light and fluffy. Add eggs, 1 at a time, beating after each addition. Mix remaining wet ingredients in a separate bowl. Add dry ingredients to butter mixture in 3 additions, alternating with wet ingredients and ending with dry. Scrape sides of bowl. Divide batter among muffin cups, filling each 2/3 full. Bake cupcakes until testers inserted into centers come out clean, about 20 minutes. Let cool in tins on wire racks. Cupcakes will keep, covered, for up to 3 days.

Happy baking!

B

KBwB-Flower-50

Baking with B appears every other Monday on the Keeping Busy with B Blog. Find out why I like baking so much here. For more of my baking, click here. And for even more recipe inspiration, check out my Pinterest full of food eye candy that will have you licking your computer. Promise.

Wanna know more about turning this recipe into a cake? Read out about how I did it here. Baking cupcakes for a crowd? I’ve got tips on how to do it here.

Baking with B: Classic Sugar Cookies

KBB_baking_sugar_cookiesThere’s no recipe collection that’s complete without the quintessential cookie: the sugar cookie. Honestly, there’s no way you could go wrong with these babies. Decorate them like crazy, or leave them plain to dip in your coffee. Cookie cutters come in virtually every shape these days, so get creative! I have a set of different flower cookie cutters that I love using in the spring and summer, but I’m also definitely digging my woodland creatures that came in a set at IKEA.

Classic Sugar Cookies (makes 2 dozen)

2 c. all-purpose flour

1/4 tsp salt

1/2 tsp baking powder

1/2 c. unsalted butter

1 c. sugar

1 large egg, lightly beaten

2 tbsp brandy or milk

1/2 tsp vanilla extract

Whisk together flour, salt and baking powder in a bowl. In another bowl, cream together butter and sugar. Working with small amounts at a time, add the dry ingredients to the wet ingredients mixing until incorporated. Add egg, brandy and vanilla and mix until smooth.

Shape dough into two discs, cover with plastic wrap and refrigerate for at least an hour.

Preheat oven to 350 degrees. Line baking sheets with nonstick baking mats or parchment paper. Set aside.

On a lightly floured work surface, roll out dough to 1/8-inch thickness. Cut into desired shapes and transfer to prepared baking sheets, leaving an inch in between each cookie. Bake until lightly golden, about 10 minutes; do not allow to brown. Transfer to cooling rack and enjoy!

B’s Tip: Cutting cookies often take much longer than the actual baking. Prepare two or three batches of cookies in advance, and use the time in between taking them in and out of the oven to prep any decorations you’d like to use and for clean up.

You can stick to icing, or you can go all out with sprinkles. Or take a more sophisticated route and dip half of the cookie into a chocolate ganache. Place on waxed paper to harden.

Happy baking!

B

KBwB-Flower-50

Baking with B appears every other Monday on the Keeping Busy with B Blog. Find out why I like baking so much here. For more of my baking, click here. And for even more recipe inspiration, check out my Pinterest full of food eye candy that will have you licking your computer. Promise.