Baking with B: Chocolate Peanut Butter Banana Cake

Back in college when my ex-boyfriend’s mom was visiting we knew it could only mean one thing- she was going to be bringing this famous cake that I dubbed “Mama B Cake”. It earned its fame mainly because it was the only thing that “Mama B” could (or would) bake. When she made it for you, you knew it was something kind of special. The cake was its own kind of love so I imagine that’s why it always tasted so good. Try as I might, my version will never be delicious as hers. (I’ve searched around for the original recipe for ages, but this one I found here was the closest I could get.)

Chocolate Peanut Butter Banana Cake

1 c. all-purpose flour

1 tsp baking soda

1/4 tsp salt

1 c. overripe bananas, mashed (about 3)

1/4 c. vegetable oil

1/2 c. smooth peanut butter

3/4 c. brown sugar

1 egg

1 tsp vanilla

2 tbsp cocoa powder

Preheat oven to 350F. Grease and flour a 9×5 loaf pan and set aside. In a medium bowl, whisk together flour, baking soda and salt. In another medium bowl, whisk together peanut butter, banana, oil, sugar, egg and vanilla until thick and yellow. Slowly add the wet ingredients to the dry, one spoonful at a time, until well combined. Pour half of the batter into prepared pan. Add cocoa to the remaining batter, stirring until combined. Dollop the chocolate batter onto the peanut butter batter, then swirl to combine using a wooden skewer.

B’s Tip: If you don’t have skewers lying around, use a chopstick, a cake tester, a knife, the handle of your mixing spoon- anything that’s long and thin!

Bake for approximately 50 minutes until knife comes out clean in the middle. Cool for approximately 10 minutes in pan before turning out onto wire rack. Let cool completely before serving.

Baking with B appears every other Monday on the Keeping Busy with B Blog. Find out why I like baking so much here. For more of my baking, click here. And for even more recipe inspiration, check out my Pinterest full of food eye candy that will have you licking your computer. Promise.

Baking with B: Chocolate Guinness Cake

Chocolate? Beer? Lime? I know what you’re thinking- how could these ingredients possibly go together?

Here’s the answer: I don’t know. But believe me, it works. The beer gives the chocolate a rich, deep flavour and the lime zest brightens things up so the cake doesn’t feel as heavy Even if you’re not a fan of Guinness (or beer in general), this is still a great cake for any chocolate lover and is perfect for St. Patrick’s Day (And no, that’s not some leprechaun trick!)

Chocolate Guinness Cake (serves 12)

1 c. Guinness beer

1 c. unsalted butter

¾ c. unsweetened cocoa powder

2 c. white sugar

2/3 c. regular sour cream

2 large eggs

1 tbsp vanilla

2 c. all-purpose flour

2 ½ tsp baking soda

icing sugar for garnish (optional)

lime zest for garnish (optional)

Preheat oven to 350F. Butter 9-inch pan and line bottom with parchment paper. Pour Guinness into large saucepan over medium heat. Add butter and heat until melted. Remove from heat and whisk in cocoa powder and sugar. Set aside. In a bowl, combine sour cream, eggs, and vanilla and beat until smooth. Add sour cream mixture to Guinness mixture, and whisk to combine. Whisk in flour and baking soda, then pour batter into prepared pan. Bake 50-60 minutes, at 350F, until tester comes out with a few crumbs clinging to it. Cool and serve with a sprinkle of icing sugar and lime shavings on top.

B’s Tip: Yeah, yeah I know it sounds weird, but go with the lime shavings! It’s honestly one of the best things about the cake.

Baking with B appears every other Monday on the Keeping Busy with B Blog. Find out why I like baking so much here. For more of my baking, click here. And for even more recipe inspiration, check out my Pinterest full of food eye candy that will have you licking your computer. Promise.

Baking with B: Amy’s Classic Lemon Squares

As we get older falling out of touch with old friends is a fact of life. Let’s face it: stuff happens. When we’re burdened with responsibilities we tend to pare life down to its essentials and sometimes it means losing contact with someone who was dear to us. Add in some misunderstandings and well, like I said…s#%! happens.

In my life, Amy is one of those people and once upon a time she asked me to make lemon squares for my blog because they’re her favorite. Luckily, a mutual friend of ours had a recipe that was tried, tested and true. We made some for her over the holidays and they were so good I thought I would share them with you as well. They’re super lemony without being too tart, and the buttery crust is surprisingly easy to make.

So cheers to you, Ameballs. We hope you liked your squares.

Amy’s Classic Lemon Squares (makes 36)

For the crust:

2 c. all-purpose flour

1/2 c. powdered sugar

2 tbsp cornstarch

1/4 tsp salt

3/4 c., plus 2 tbsp butter, chilled and cubed

For Filling:

4 eggs, lightly beaten

1 1/2 c. granulated sugar

3 tbsp all-purpose flour

1 tsp lemon zest

3/4 c. lemon juice

1/4 c. cream

powdered sugar (for dusting)

To make the crust, preheat oven to 350F. In a bowl combine flour, sugar, cornstarch and salt. Cut in butter until mixture is crumbly. Press mixture into the bottom of a greased 13x9x2 inch baking pan. Bake 18-20 minutes until the edges are golden.

While the crust is baking, prepare the filling: combine eggs, granulated sugar, flour, lemon zest, lemon juice and cream in a bowl. Remove crust from oven and pour filling over the top. Return to the oven to bake for 15-20 minutes more or until the center is set.

B’s Tip: Test if your lemon curd is set by giving it a little bit of a wiggle, wiggle. If it’s wobbly like Jello, it’s not quite ready.

Cool completely in pan on a wire rack before cutting into squares. Dust with powdered sugar, if desired. Cover and store in the refrigerator (or make them ahead of time and put them in the freezer!)

Baking with B appears every other Monday on the Keeping Busy with B Blog. Find out why I like baking so much here. For more of my baking, click here. And for even more recipe inspiration, check out my Pinterest full of food eye candy that will have you licking your computer. Promise.

This is one of those recipes that I would call a “classic”- one of those down-home, feel-good dishes that everyone should learn how to make! Find more timeless recipes like this click here.

7 Days of Christmas: Apricot-Pistachio Layer Cookies

Psst- this post is in a series where I share my family’s tradition of baking seven different cookies every Christmastime. To save time and money, each cookie in this series is based on this basic vanilla cookie dough recipe.

This is my favorite cookies I made this year, and by far the trickiest (in fact, it may be one of my more fiddly recipes). I’m not going to lie- it was a little labor intensive- but totally worth the effort. The results are pretty and delicious and deeply satisfying to that sweet/salty craving we all get from time to time. Apricots and pistachios? Yes please!

Apricot-Pistachio Layer Cookies (yields 12 dozen)

1 c. ground pistachios

2/3 c. apricot jam

one batch of this vanilla cookie dough (include the baking powder this time!)

Prepare the vanilla cookie dough by following the instructions here. Shape dough into two discs, wrap in plastic wrap and refrigerate until firm, approximately 1 hour. Remove dough from fridge and roll out into a floured surface until about 1/8-inch thick. Cut the dough into 2×9-inch strips. Spread 2 tsp of jam onto one strip; and sprinkle with approximately 2 tbsp. Top with another strip of dough and repeat the process until you have 3-5 layers, leaving the topmost layer plain. Wrap in plastic wrap and refrigerate again for 2 hours.

Once dough is set, remove from fridge and unwrap from plastic wrap. Using a clean, sharp knife, slice dough crosswise, approximately 1/8-inch thick. Place on a cookie sheet approximately 1/2-inch apart. Bake in an oven preheated to 350F on a parchment-lined cookie sheet until firm, approximately 12-14 minutes.

I’m counting down Christmas by sharing some of my favourite holiday cookie recipes with you! I’ll be posting a different Christmas cookie recipe every day for the next seven days so you can follow along in my family’s baking tradition, and have more cookies to add to your Christmas baking arsenal! For more inspiration, you can check out more of my baking here. For even more recipe inspiration check out my Pinterest full of food eye candy that will have you licking your computer. Promise.

7 Days of Christmas Cookies: Tropical Triangles

Psst- this post is in a series where I share my family’s tradition of baking seven different cookies every Christmastime. To save time and money, each cookie in this series is based on this basic vanilla cookie dough recipe.
Citrus isn’t a really traditional choice for Christmas fare, but I couldn’t resist something a little fruity, festive and bright to counterpoint all that sweet chocolate-y stuff we get around this time of year. One friend said this brought back memories of the pineapple-baked ham her mom served at Christmastime. Another told me this cookie was like spending Christmas on the beach. It may be an unusual choice for a Christmas cookie platter, but trust me- you’ll be gobbling them up just like my friends did.

Tropical Triangles (yields 10 dozen)

2 tbsp grated lemon zest

1/3 c. finely chopped dried pineapple

1/3 c. finely chopped dried papaya

one batch of this vanilla cookie dough (include the baking powder this time!)

Prepare the vanilla cookie dough by following the instructions here. Incorporate lemon zest into dough until fully integrated; follow suit with the papaya and pineapple.  Divide dough into two logs, about 10 inches each long each. Use the palm of your hand or a rolling pin to flatten each long into a rectangle about 1-1/2 inches high. Wrap each rectangle in plastic wrap and refrigerate on a flat surface (like a cookie sheet) until very firm, approximately two hours.

Once dough is set, remove from fridge and unwrap from plastic wrap. Using a clean, sharp knife, slice your log into wedges, approximately 1-inch thick. Place on a cookie sheet approximately 1/2-inch apart. Bake in an oven preheated to 350F on a parchment-lined cookie sheet until firm, approximately 12-14 minutes.

I’m counting down Christmas by sharing some of my favourite holiday cookie recipes with you! I’ll be posting a different Christmas cookie recipe every day for the next seven days so you can follow along in my family’s baking tradition, and have more cookies to add to your Christmas baking arsenal! For more inspiration, you can check out more of my baking here. For even more recipe inspiration check out my Pinterest full of food eye candy that will have you licking your computer. Promise.

7 Days of Christmas Cookies: White Chocolate, Hazelnut and Cherry Coins

Psst- this post is in a series where I share my family’s tradition of baking seven different cookies every Christmastime. To save time and money, each cookie in this series is based on this basic vanilla cookie dough recipe.
Talking with my friends about the food that we were nostalgic for when we were young inspired this Christmas recipe. I don’t really maraschino cherries, but the idea of making a slightly-less sweet (but no less delicious) cookie version of a cherry blossom was the closest I could get to making my friends the real thing. (In fact, it was so much fun that I might end up making real cherry blossoms next time!) For those of you who don’t have a sweet tooth, not to fear- the nuttiness takes a little bit of the edge off.

White Chocolate, Hazelnut and Cherry Coins (yields 10 dozen)

1/3 c. finely crushed hazelnuts

1/3 c. finely chopped white chocolate

1/3 c. whole maraschino cherries

one batch of this vanilla cookie dough (include the baking powder this time!)

Prepare the vanilla cookie dough by following the instructions here. In a separate bowl, mix together nuts and white chocolate. Incorporate into cookie dough until fully mixed. Divide  dough into four logs, about 5 inches each. Set two aside. With the remaining two, make a trench down the middle of the log using your finger or the handle of a wooden spoon. Carefully line with whole maraschino cherries, taking care not to leave too many gaps, but not cramming them so close together that they’ll squish. Cover each cherry log with the other plain cookie dough log and carefully mold the two together, taking care to make sure the dough fully conceals the cherries. Wrap each log in plastic wrap and refrigerate on a flat surface (like a cookie sheet) until very firm, approximately two hours.

Once dough is set, remove from fridge and unwrap plastic wrap. (Reshape the log if it’s looking a little sad.) Using a clean, sharp knife, slice your log into diagonal pieces, approximately 1/8-inch thick. If you go slowly and carefully enough, each of your cookies should have a slice of cherry in the middle! Place on a cookie sheet approximately 1/2-inch apart. Bake in an oven preheated to 350F on a parchment-lined cookie sheet until firm, approximately 12-14 minutes.

I’m counting down Christmas by sharing some of my favourite holiday cookie recipes with you! I’ll be posting a different Christmas cookie recipe every day for the next seven days so you can follow along in my family’s baking tradition, and have more cookies to add to your Christmas baking arsenal! For more inspiration, you can check out more of my baking here. For even more recipe inspiration check out my Pinterest full of food eye candy that will have you licking your computer. Promise.

7 Days of Christmas: Cranberry, Pistachio and Almond Cookies

Psst- this post is in a series where I share my family’s tradition of baking seven different cookies every Christmastime. To save time and money, each cookie in this series is based on this basic vanilla cookie dough recipe.

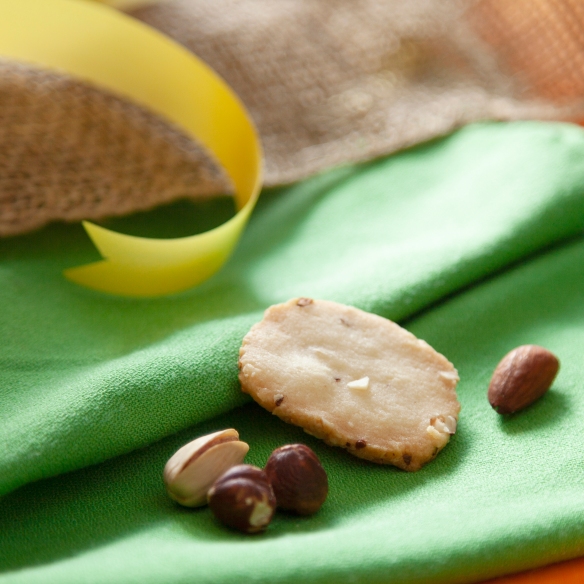
There was a patient at the office who used to bring batches of these cookies around Christmastime. They became famous in our office because we couldn’t believe that such a frail, elderly lady had the stamina to stand in front of the oven for days on end as she must have done, baking all of these cookies for her family and friends. She was so slouch either- each one was perfectly shaped, sliced and baked to perfection. This version pales in comparison to hers but it was the closest I could come. Try them for yourself and see why these cookies became such an obsession!

Cranberry, Pistachio and Almond Cookies (yields 10 dozen)

1/3 c. finely crushed pistachios

1/3 c. finely crushed almonds

1/3 c. finely chopped dried cranberries

one batch of this vanilla cookie dough (include the baking powder this time!)

Prepare the vanilla cookie dough by following the instructions here. In a separate bowl, mix together nuts and cranberries. Incorporate with the cookie dough. Once they’ve been mixed in, divide dough in two pieces. Shape each into a log approximately 10 inches long. Wrap each log in plastic wrap and refrigerate on a flat surface (like a cookie sheet) until very firm, approximately two hours.

Once dough is set, remove from fridge and unwrap plastic wrap. (Reshape the log if it’s looking a little sad.) Using a clean, sharp knife, slice your log into diagonal pieces, approximately 1/8-inch thick. Place on a cookie sheet approximately 1/2-inch apart. Bake in an oven preheated to 350F on a parchment-lined cookie sheet until firm, approximately 12-14 minutes.

I’m counting down Christmas by sharing some of my favourite holiday cookie recipes with you! I’ll be posting a different Christmas cookie recipe every day for the next seven days so you can follow along in my family’s baking tradition, and have more cookies to add to your Christmas baking arsenal! For more inspiration, you can check out more of my baking here. For even more recipe inspiration check out my Pinterest full of food eye candy that will have you licking your computer. Promise.

7 Days of Christmas Cookies: Yule Nut Log

Psst- this post is in a series where I share my family’s tradition of baking seven different cookies every Christmastime. To save time and money, each cookie in this series is based on this basic vanilla cookie dough recipe.

Let’s face it: Christmas is overloaded with sweet stuff. Between holiday parties and gifts and caroling with hot cocoa, we’ll probably consume enough sugar to last us for the whole year. (Or at least for a couple of weeks.)

That’s why I always think it’s nice to include a not-so-sweet cookie with a subtle flavor. Buttery vanilla pairs beautifully with any kind of salty, nutty flavor and it’s perfect with the hot drink of your choice.

Yule Nut Log (yields 10 dozen)

1/3 c. finely crushed peanuts

1/3 c. finely crushed pistachios

1/3 c. finely crushed hazelnuts

1/3 c. finely crushed almonds

one batch of this vanilla cookie dough (include the baking powder this time!)

Prepare the vanilla cookie dough by following the instructions here. In a separate bowl, mix together nuts. Pour in 1/3 of the bowl and incorporate with the cookie dough. (I wanted my cookies to have a really nutty flavor, but if you’re not into it then just keep all the nuts for the next part). Once incorporated, divide the dough in two pieces. Shape each into a log approximately 10 inches long. Spread out the rest of the nut mixture onto a flat surface and roll each log in it until fully coated, patting down as you go along to prevent too many crumbly bits falling off. Wrap each log in plastic wrap and refrigerate on a flat surface (like a cookie sheet) until very firm, approximately two hours.

Once dough is set, remove from fridge and unwrap plastic wrap. (Reshape the log if it’s looking a little sad.) Using a clean, sharp knife, slice your log into diagonal pieces, approximately 1/8-inch thick. Place on a cookie sheet approximately 1/2-inch apart. Bake in an oven preheated to 350F on a parchment-lined cookie sheet until firm, approximately 12-14 minutes.

I’m counting down Christmas by sharing some of my favourite holiday cookie recipes with you! I’ll be posting a different Christmas cookie recipe every day for the next seven days so you can follow along in my family’s baking tradition, and have more cookies to add to your Christmas baking arsenal! For more inspiration, you can check out more of my baking here. For even more recipe inspiration check out my Pinterest full of food eye candy that will have you licking your computer. Promise.

7 Days of Christmas Cookies: Dried Fruit Thumbprints

Psst- this post is in a series where I share my family’s tradition of baking seven different cookies every Christmastime. To save time and money, each cookie in this series is based on this basic vanilla cookie dough recipe.

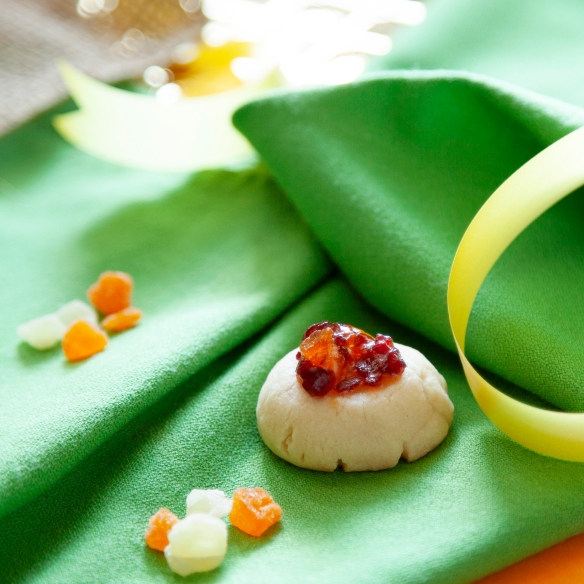
Dried fruit puts people instantly in mind of ancient fruit cakes from distant aunts that end up being used as doorstops but if you think this cookie is going to end up re-gifted (as so many fruit cakes are) you are mistaken. Pay no attention to the name- chopped dried fruit mixed into apricot jam packs a punch that’s neither too sweet or too tart in what would otherwise be a boring (but tasty!) thumbprint cookie.

Dried Fruit Thumbprints (yields approx. 5 dozen)

1 c. finely chopped dried fruit (I used dried cranberries, dried papaya and dried pineapple)

1 tbsp apricot jam

one batch of this vanilla cookie dough (minus the baking powder!)

Prepare the vanilla cookie dough by following the instructions here. Roll the dough out into 1-inch balls. Arrange on parchment-lined baking sheets, about 1 inch apart. Make a well in the center of each cookie by pressing down your finger. Refrigerate the dough until firm, about 30 minutes. Bake at 350F for 7 minutes. Remove cookies from oven and make sure the well in each centre is still firm (I used the handle of a wooden spoon). Bake for another 7-9 minutes.

Place cookies on rack to cool. In a small bowl, mix together the dried fruit and jam (I used apricot, but depending on the fruit you use you may wish to experiment with another flavour. Use a small spoon to fill the centre of each cookie with the jam mixture. Let the jam set before serving.

Happy baking!

B

I’m counting down Christmas by sharing some of my favourite holiday cookie recipes with you! I’ll be posting a different Christmas cookie recipe every day for the next seven days so you can follow along in my family’s baking tradition, and have more cookies to add to your Christmas baking arsenal! For more inspiration, you can check out more of my baking here. For even more recipe inspiration check out my Pinterest full of food eye candy that will have you licking your computer. Promise.

7 Days of Christmas Cookies: White Chocolate Cranberry Thumbprints

Psst- this post is in a series where I share my family’s tradition of baking seven different cookies every Christmastime. To save time and money, each cookie in this series is based on this basic vanilla cookie dough recipe.

I don’t know why, but there’s something about the combination of cranberries and white chocolate that feels so Christmas-y. It’s a pretty flavor combo too: I find white chocolate on its own a little too sweet but that tart cranberry just gives it that little bit of edge. It doesn’t hurt either that these cookies feature just the teeniest taste of each, giving you the best of both worlds in one tiny little punch smack dab in the centre of the cookie.

White Chocolate Cranberry Thumbprints (approx. 5 dozen)

1 c. white chocolate, melted

1/2 c. dried cranberries (to taste)

one batch of this vanilla cookie dough (minus the baking powder!)

Prepare the vanilla cookie dough by following the instructions here. Roll the dough out into 1-inch balls. Arrange on parchment-lined baking sheets, about 1 inch apart. Make a well in the center of each cookie by pressing down your finger. Refrigerate the dough until firm, about 30 minutes. Bake at 350F for 7 minutes. Remove cookies from oven and make sure the well in each centre is still firm (I used the handle of a wooden spoon). Bake for another 7-9 minutes.

Place cookies on rack to cool. Using a small spoon or piping bag, fill the centre of each cookie with melted white chocolate. Sprinkle dried cranberries on top as desired. Let chocolate fully sit before serving. These are best stored in the fridge until your guests arrive! (But I won’t lie- they still taste pretty good all chocolatel-y and gooey and warm.

Happy baking!

B

I’m counting down Christmas by sharing some of my favourite holiday cookie recipes with you! I’ll be posting a different Christmas cookie recipe every day for the next seven days so you can follow along in my family’s baking tradition, and have more cookies to add to your Christmas baking arsenal! For more inspiration, you can check out more of my baking here. For even more recipe inspiration check out my Pinterest full of food eye candy that will have you licking your computer. Promise.